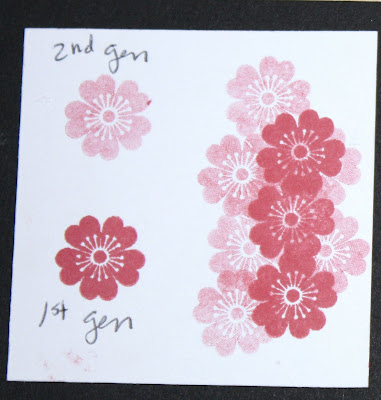
Benefits of 2nd G stamping:
- Extends your color palette with a lighter version of your ink colors
- It’s a great way to a get a perfectly coordinated 2nd color on your project.
- Great technique for your filler and out-line CTMH stamps
How to do it: Load image with ink. Stamp once on project or scrap paper. Then without
re-inking image, stamp it a second time on your project.
|
From ctmh spng 09 |
Card sample:
 |
| From ctmh spng 09 |
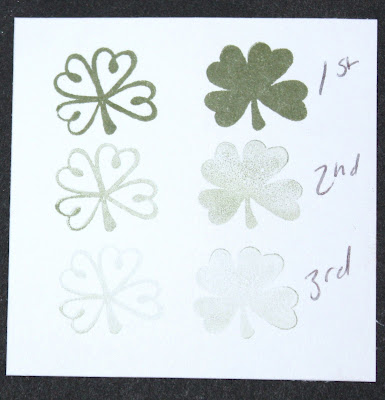
Filler and outline stamps
CTMH stamps often come with a filler and an outline stamp on a set.
1) Place outline stamp on your block. Load image with ink. Stamp directly on to the project.
2) Place filler stamp on block. Load image with ink. Stamp once onto scratch paper. Then without re-inking, stamp inside the out-lined image.
 |
| From ctmh spng 09 |
Tip: when ever stamping out lines and fillers, I find it is easiest to stamp the darker image first. It is easier to see the darker image when lining up the next stamp.
Card Sample:
 |
| From ctmh spng 09 |
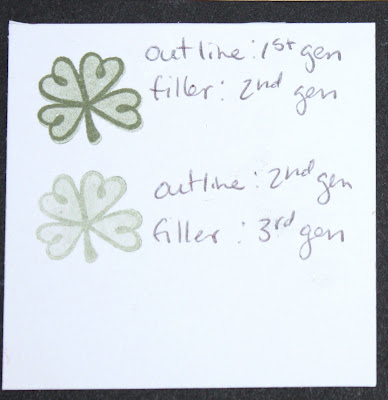
Mix and match the out line and filler stamps with the different generation levels:
 |
| From ctmh spng 09 |
x
 |
| From ctmh spng 09 |
For a falling look with depth use out line, filler, and different generation levels.
 |
| From ctmh spng 09 |
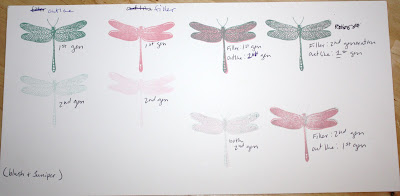
Mix and match different colors and different generation levels:
 |
| From ctmh spng 09 |
Card sample
 |
| From ctmh spng 09 |
Shadow technique:
1) Stamp the image onto the project (1st generation)
2) Without re-inking stamp the image again to the side of the first image like a shadow (2nd generation)
 |
| From ctmh spng 09 |
 |
| From ctmh spng 09 |
Card Sample:
 |
| From ctmh spng 09 |
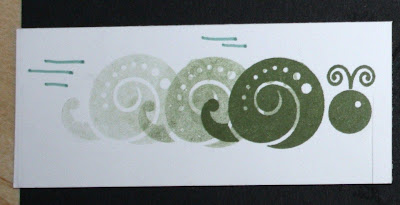
Add depth to a grove of trees, or a feild of flowers:
 |
| From ctmh spng 09 |
change the depth of your shadow
 |
| From ctmh spng 09 |
For a speeding look ( i.e. car driving) – without re-inking stamp again to the side of the shadow (3rd generation)
 |
| From ctmh spng 09 |
Card sample:
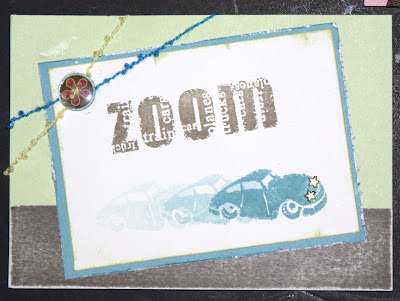 |
| From ctmh spng 09 |
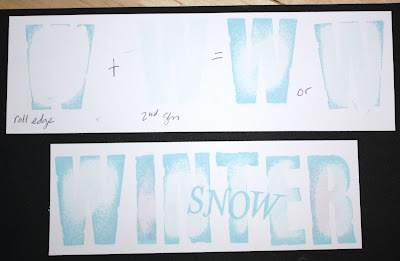
Alphabet with 2nd generation
Use two sizes of fonts.
1) Stamp the smaller font size first ( i.e. always)
2) Stamp the larger size font over the smaller font using 2nd generation.( i.e. LOVE)
This will create a layered image that says LOVE always
 |
| From ctmh spng 09 |
Variation:
Roll your letters so that only the edge touches the ink pad. Stamp letter. Second generation stamp the inside of the rolled edges.
 |
| From ctmh spng 09 |
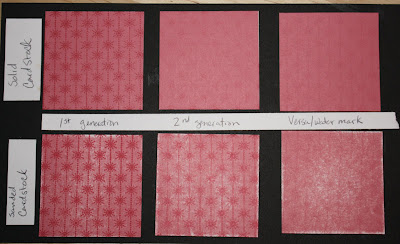
On cardstock
I love the look of 2nd generation on colored cardstock.
· Use either the same (or similar) color or a different color completely.
· I also love to sand down the CTMH cardstock and 2nd generation stamp designs onto the sanded paper for a unique distressed look.(be sure to blow off any excess cardstock dust before stamping)
 |
| From ctmh spng 09 |
Card sample:
 |
| From ctmh spng 09 |
|
| From ctmh spng 09 |
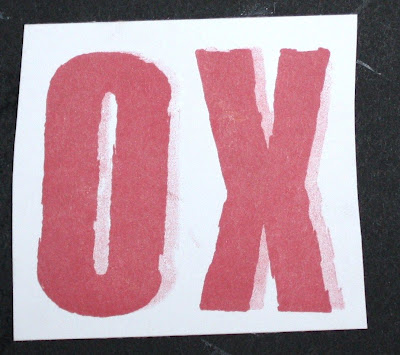
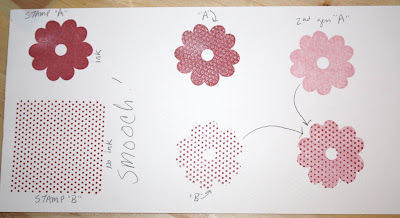
Kissing technique
Pick two stamps. One should have a design (A) and the other should be a solid shape (B).
1) Ink up stamp B (solid stamp). Do not put ink onto stamp A - leave it dry.
2) Take stamp B and stamp it onto stamp A (design); as if the stamps are “kissing”
3) Now take stamp A and stamp it onto the paper. This should leave the design in the shape of the solid stamp.
4) Now take stamp B (solid stamp) and re-ink it. Stamp it once onto scrap paper, then over the design from stamp A. (2nd generation stamp the solid stamp over the design left by stamp A)
· After step 2 you can take stamp B and stamp it onto paper for a different look.
 |
| From ctmh spng 09 |
Card Sample:
 |
| From ctmh spng 09 |
I love how easy and versital second generation stamping is.
 |
| From ctmh spng 09 |


1 comment:
Thanks for this...its very informative, great ideas!!!!
Post a Comment