Wednesday, April 15, 2009

Our April technique lesson will be on Masking. Here is the teaser:
Using the masking technique I was able to make her dress a different color, but have it appear smooth, like a single stamp.
These ladies are also a teaser for the stamp of the month in May (the Summer Idea book!!)
I have made her hate a different color
Note: "the secret to staying young" is not part of this stamp set - I purchased it in the discount section of my website.
 |
| From lesson |
Using the masking technique I was able to make her dress a different color, but have it appear smooth, like a single stamp.
 |
| From lesson |
These ladies are also a teaser for the stamp of the month in May (the Summer Idea book!!)
 |
| From lesson |
I have made her hate a different color
 |
| From lesson |
Note: "the secret to staying young" is not part of this stamp set - I purchased it in the discount section of my website.
Wednesday, April 1, 2009
 In honor of National Scrapbooking Month, CTMH is tickled pink to share this special paper pack. You will be just as tickled when you see the fun glitter pages, wonderful colors, and the cute stamp set! Each pack comes with the following:
1 – My acrylix “I Am” Stamp Set (D-size)
2 – 12x12 floral B&T paper (1 with glitter)
2 – 12 x 12 striped B&T Duos Paper (1 with glitter)
1 – 12x12 Blush textured Cardstock
1 – 12x12 Crystal Blue Textured Cardstock
5 – 12 x12 white daisy textured Cardstock ( 1 sheet with die-cut shapes)
1 – Mini-medley accents white daisy collection
1 – Foam texture tool
1 - Brochure
How can you get this wonderful set you might ask? It’s simple: Spend $60 in stamps and get the Tickled Pink set free! Or purchase this set for $34.95 – well below retail value! If you host a gathering and your party makes a minimum of $400, then the hostess gets it free.
This special will be available April 15th through May 31st!
click on the flyer above.
2nd Generation Stamping
Benefits of 2nd G stamping:
- Extends your color palette with a lighter version of your ink colors
- It’s a great way to a get a perfectly coordinated 2nd color on your project.
- Great technique for your filler and out-line CTMH stamps
How to do it: Load image with ink. Stamp once on project or scrap paper. Then without
re-inking image, stamp it a second time on your project.
- Extends your color palette with a lighter version of your ink colors
- It’s a great way to a get a perfectly coordinated 2nd color on your project.
- Great technique for your filler and out-line CTMH stamps
How to do it: Load image with ink. Stamp once on project or scrap paper. Then without
re-inking image, stamp it a second time on your project.
|
From ctmh spng 09 |
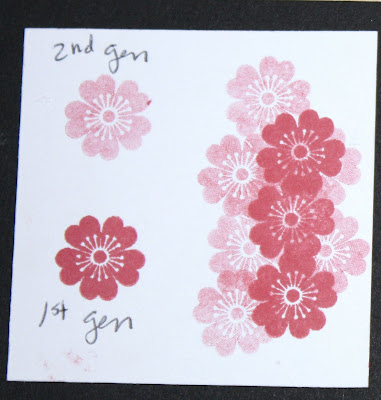
Card sample:
 |
| From ctmh spng 09 |
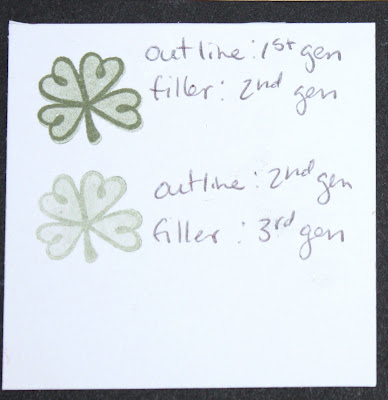
Filler and outline stamps
CTMH stamps often come with a filler and an outline stamp on a set.
1) Place outline stamp on your block. Load image with ink. Stamp directly on to the project.
2) Place filler stamp on block. Load image with ink. Stamp once onto scratch paper. Then without re-inking, stamp inside the out-lined image.
 |
| From ctmh spng 09 |
Tip: when ever stamping out lines and fillers, I find it is easiest to stamp the darker image first. It is easier to see the darker image when lining up the next stamp.
Card Sample:
 |
| From ctmh spng 09 |
Mix and match the out line and filler stamps with the different generation levels:
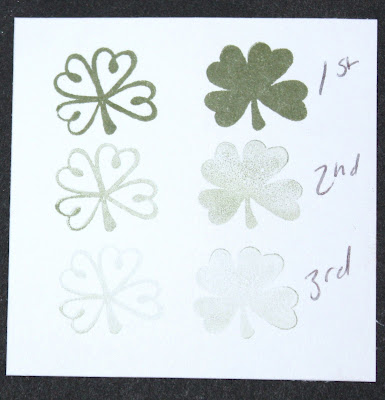 |
| From ctmh spng 09 |
x
 |
| From ctmh spng 09 |
For a falling look with depth use out line, filler, and different generation levels.
 |
| From ctmh spng 09 |
Mix and match different colors and different generation levels:
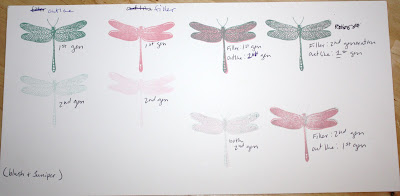 |
| From ctmh spng 09 |
Card sample
 |
| From ctmh spng 09 |
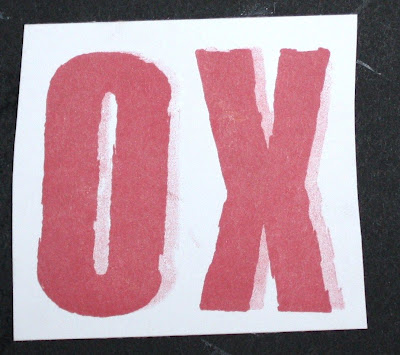
Shadow technique:
1) Stamp the image onto the project (1st generation)
2) Without re-inking stamp the image again to the side of the first image like a shadow (2nd generation)
 |
| From ctmh spng 09 |
 |
| From ctmh spng 09 |
Card Sample:
 |
| From ctmh spng 09 |
Add depth to a grove of trees, or a feild of flowers:
 |
| From ctmh spng 09 |
change the depth of your shadow
 |
| From ctmh spng 09 |
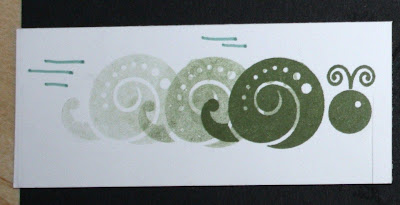
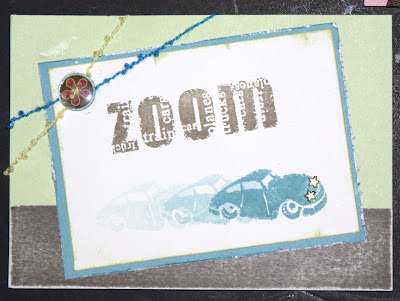
For a speeding look ( i.e. car driving) – without re-inking stamp again to the side of the shadow (3rd generation)
 |
| From ctmh spng 09 |
Card sample:
 |
| From ctmh spng 09 |
Alphabet with 2nd generation
Use two sizes of fonts.
1) Stamp the smaller font size first ( i.e. always)
2) Stamp the larger size font over the smaller font using 2nd generation.( i.e. LOVE)
This will create a layered image that says LOVE always
 |
| From ctmh spng 09 |
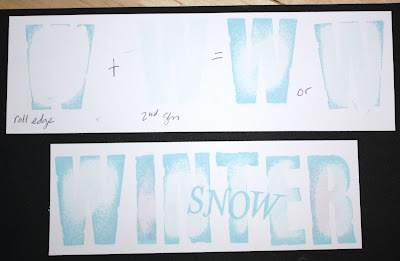
Variation:
Roll your letters so that only the edge touches the ink pad. Stamp letter. Second generation stamp the inside of the rolled edges.
 |
| From ctmh spng 09 |
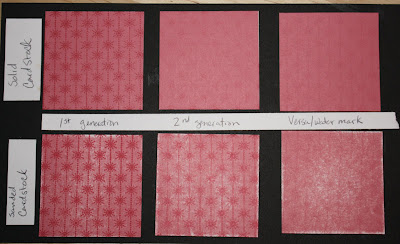
On cardstock
I love the look of 2nd generation on colored cardstock.
· Use either the same (or similar) color or a different color completely.
· I also love to sand down the CTMH cardstock and 2nd generation stamp designs onto the sanded paper for a unique distressed look.(be sure to blow off any excess cardstock dust before stamping)
 |
| From ctmh spng 09 |
Card sample:
 |
| From ctmh spng 09 |
|
| From ctmh spng 09 |
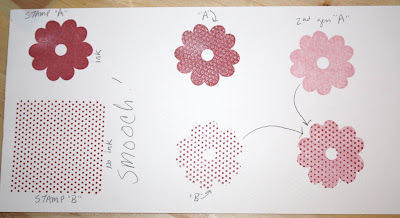
Kissing technique
Pick two stamps. One should have a design (A) and the other should be a solid shape (B).
1) Ink up stamp B (solid stamp). Do not put ink onto stamp A - leave it dry.
2) Take stamp B and stamp it onto stamp A (design); as if the stamps are “kissing”
3) Now take stamp A and stamp it onto the paper. This should leave the design in the shape of the solid stamp.
4) Now take stamp B (solid stamp) and re-ink it. Stamp it once onto scrap paper, then over the design from stamp A. (2nd generation stamp the solid stamp over the design left by stamp A)
· After step 2 you can take stamp B and stamp it onto paper for a different look.
 |
| From ctmh spng 09 |
Card Sample:
 |
| From ctmh spng 09 |
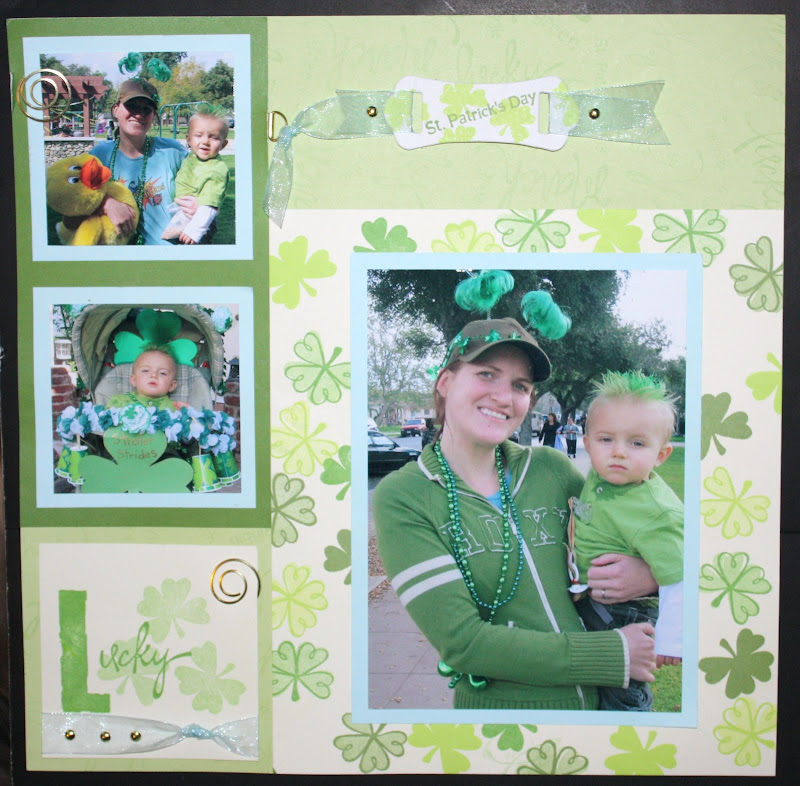
I love how easy and versital second generation stamping is.
 |
| From ctmh spng 09 |
Monday, March 16, 2009
journal Challege: March
How do you define INTEGREITY and do you have it?
Who do you know that you admire for their integreity?
Who do you know that you admire for their integreity?
How are your photo's stored?
These pictures are from my CTMH up-line and friend, Starr Nelson. Last week her house caught fire and burned almost completely. No one was home at the time, so everyone is safe. Starr had no warning, no chance to grab anything. I hope that these pictures will make you think about your photo's and journaling - even the best insurance can't replace those memories.

When I first heard about Starr's house, I was in shock. I can't imagine losing everything in one night. Most things are replaceable, but we all have a few things that can never be replaced.

Starr was grateful that her family was ok. My sister helped her dig through the ash. On a psoitive note the CTMH albums that were packed close on the shelf weren't completely ruined. Many of the pictures in the albums were salvagable and in decent condition. However, one album was left open on the couch. The heat from the couch fire left nothing from that album.

Keeping her chin up, and being postivie, Starr dug through the ash and was grateful for what she found. Because she has insurance, she can rebuild her house (and maybe plan for her dream scrapbook room this time) However, when she saw the following picture she begain to cry.
 This picture was kept on the wall of her living room. It is the ONLY picture she has of her eldest son's 1st Christmas. That year they forgot to get more film ( a mistake we all make) but were able to use the last shot in a role to take that picture. My brother (who is in school for advertising) is going to scan it and see what he can do with photoshop - maybe make the ash look like snow. However, all Starr had to do was scan it into her computer 1 time. Then post the picture on an on-line site (like snap fish or wal-greens) where you can download your photo's no charge. And she wouldn't have almost lost one of her most valuable memories.
When I first heard about Starr's house, I was in shock. I can't imagine losing everything in one night. Most things are replaceable, but we all have a few things that can never be replaced.
Starr was grateful that her family was ok. My sister helped her dig through the ash. On a psoitive note the CTMH albums that were packed close on the shelf weren't completely ruined. Many of the pictures in the albums were salvagable and in decent condition. However, one album was left open on the couch. The heat from the couch fire left nothing from that album.
Keeping her chin up, and being postivie, Starr dug through the ash and was grateful for what she found. Because she has insurance, she can rebuild her house (and maybe plan for her dream scrapbook room this time) However, when she saw the following picture she begain to cry.
 This picture was kept on the wall of her living room. It is the ONLY picture she has of her eldest son's 1st Christmas. That year they forgot to get more film ( a mistake we all make) but were able to use the last shot in a role to take that picture. My brother (who is in school for advertising) is going to scan it and see what he can do with photoshop - maybe make the ash look like snow. However, all Starr had to do was scan it into her computer 1 time. Then post the picture on an on-line site (like snap fish or wal-greens) where you can download your photo's no charge. And she wouldn't have almost lost one of her most valuable memories.
What can you do to make sure this doesn't happen to you?
Film pictures: Where do you keep your negatives?
Most of us have them scatter in shoe boxes in storage.
What to do:
Step 1)Take your film to Wal Greens (or other film processing stores) and have all your negatives put on CD. You don't have to do anything fancy your self- just tell the nice sales people what you want.
Step 2) Up load your photos to a photo site (i.e. snapfish.com, walgreens.com)
Digital Camera
Step 1) upload your photo's to a site like snapfish.com or walgreens.com
step 2) while you are at it - put your photo's on 1 other home source - like CD's or an extra hard drive.
Journals:
Step 1) put your journals in a fire proof case/vault
Other option : Scan each page of your journals onto a memory card, or onto your computer - then onto a CD. Then put the CD into the fire proof case.
Sounds like alot of work doesn't it? Every day for 10 minutes save your photo's or journals this way.
THIS CAN HAPPEN TO YOU!! DON'T REGRET NOT TAKING THESE SIMPLE STEPS!
Tuesday, February 3, 2009
Journal Challenge: Feb
I randomly drew a question out of my mysterious tupperware container! This months journal question is:
What fashion trend you followed was very cool then, but now looks ridiculous?
I think this would be a fun question to scrap! Remember, if you aren't scraping your answers, at least write them down in a journal!
Subscribe to:
Posts (Atom)


 Posts
Posts

